James Chen
Any questions, email: jamescc@princeton.edu
Operation
Printing from SD
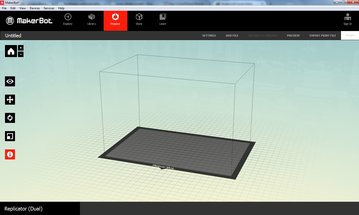
The FlashForge Creator Pro only recognizes .x3g files when you select the “Print from SD” function on the main screen. Use the Makerbot Desktop Software (MakerWare) to import .stl files using “Add File” and export them as .x3g files using “Export Print File”. If needed, you can use the functions on the right to adjust settings such as extruder selection, rotation, and changing position.
Printing with flexible filament (NinjaFlex)
Printing with flexible filament requires very specific settings because of its unique nature. These settings can all be implemented by adding your own custom setting in the Makerbot Desktop Software under “Settings”. After many trials, I have found these settings to work the best for me when printing NinjaFlex. You may alter them as you like, and let Professor Littman know if you find that your settings work better.
Build Plate: Glass plate with WolfBite adhesion solution
Raft: (Disable this feature)
Extruder Temperature: 225 C
Extruder Filament Diameter: 1.25 mm
Platform Temperature: 80 C
Set all print speeds to: 15 mm/sec
Unloading/Loading Filament

You can replace the spools of plastic for different colors. On the printer main menu, go from Utilities —> Filament Settings to find the options for loading/unloading new filament.
If the unload function isn’t working properly, another way is to manually remove the nozzle, clip the remaining hanging plastic (don’t clip the tube that is attached to the nozzle!), and then pull out the filament from the top of the extruder. Don’t worry about the remaining plastic in the tube, because when you load the new filament, it will melt out all of the previous plastic. Screw the nozzle back into place, and load new filament into the top. Then use the “Load right/left” function on the same menu, which will heat up the plastic and start pushing it out the nozzle. (You will see some of the old color printing out first, which is the leftover plastic that was in the plastic tube, and then you should start to see the new color plastic printing out).
Using the Build Plate
 It is very important that the build plate is clean (free of dust, glue, or any other particles), so the plastic adheres to the surface without peeling up during the printing process. If the plastic peels while printing, it can lead to distorted dimensions, destruction of the object, or clogging of the nozzles. The FlashForge Creator Pro in the EPICS room is calibrated for the blue “FLASHFORGE” build plate, but you may try the thicker glass one if you’d prefer (though it may require some recalibration). If you can’t scrape everything off the build plate, another way to create a smooth/clean surface for the 3D print is to cover the surface with masking tape. You can also take it another step further and cover the tape surface with glue.
 An alternative is to flip the FLASHFORGE build plate and print directly on top of the glass. Use the foam applicator to apply the Wolfbite adhesion solution to the bed. Give the solution around 10 minutes to dry, then the printed plastic should stick to the plate.
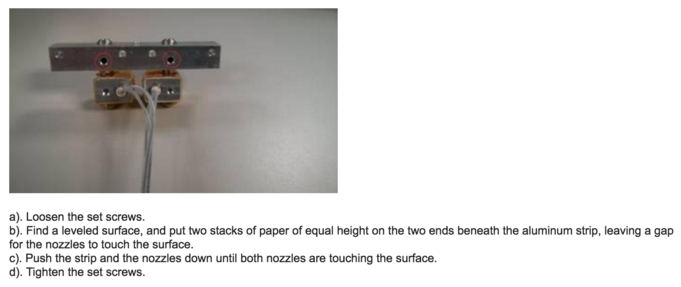
Adjusting Nozzle Height
Maintenance
Cleaning Nozzles
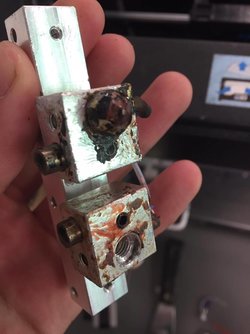 Printing with plastic can be a mess, and proper cleaning and maintenance is important in order to ensure successful and smooth printing. A simple way to prevent the nozzles from getting clogged is to make sure that they are clean. A messy extruder could look like this:
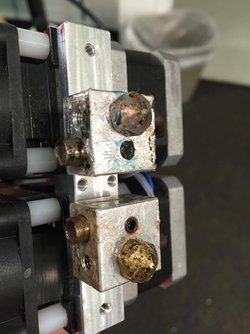 Remove the nozzles using a wrench or nut driver. Then place any part that is covered in plastic in acetone (make sure you are using a correct/safe container for acetone!) Let the parts sit for a few hours, and then the plastic should be easily scraped off with any sharp object (I used a razor blade).
You can watch this video for a visual walkthrough: https://www.youtube.com/watch?v=x3yp6H4D_ao