Eric Ham, Rebecca Van Dyke, Mark Abate
Objective
Our objective for this project is to find easy, inexpensive ways to produce quality lenses, possibly making use of 3D printer technology. This is challenging because conventional 3D printers themselves do not print in a high enough resolution for optical quality instruments. In pursuit of this, we’ve tried a number of different procedures.
Procedure 1
Casting Lenses with Craft Store Epoxy Resin
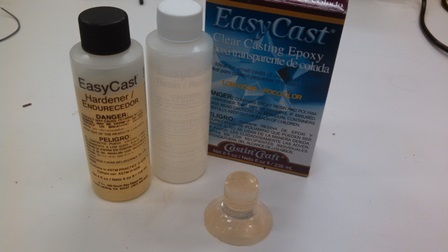
We read a paper by Christopher Olah detailing his own efforts towards this goal. Based on his results, we concluded that using a craft store polyester or epoxy resin in a mold would be a good place to start. We acquired two different resins, made small samples using parts of a water bottle, and found the qualities to be vastly different, as you can see below. EasyCast clear casting epoxy came out very yellow and bubbly, while Castin’ Craft polyester casting resin was very clear and unblemished after it hardened.
![]()
We started by 3D printing molds for convex lenses 1 inch in diameter with a 10 cm focal length. We printed enough so that we could make one biconvex and one planoconvex lens. This method was less than successful. The specified lens was so small that it was very difficult to syringe the resin into the mold. After the resin had set, it was very difficult to open up the molds, in part because the 3D-printed plastic was actually softer than the resin. In addition, the ridges inherently present in 3D printed objects were very prominent in the resin. Overall, we encountered multiple setbacks using this procedure and would not recommend using it again without some serious modifications.
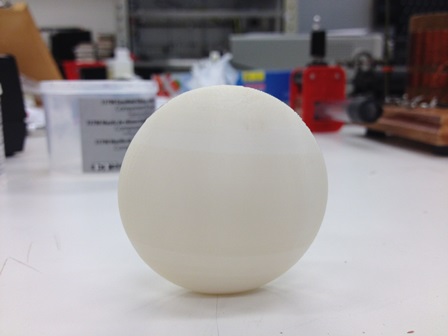
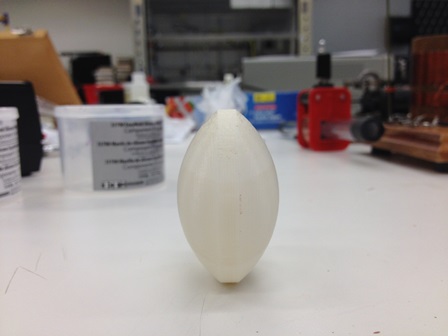
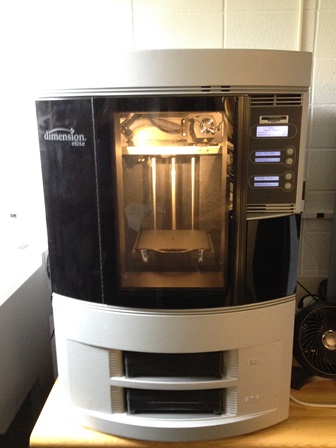
The next thing we tried was essentially to replicate Christopher Olah’s results. We 3D printed a “lens positive”, a piece of opaque plastic in the shape of our desired lens. This time we were careful to print using the orientation that would give us the smoothest lens surface. The printer we used achieves a finer detail on the sides of the object than on the layers building upwards, so we printed the lens positive in a vertical orientation as seen in views 2 and 3.

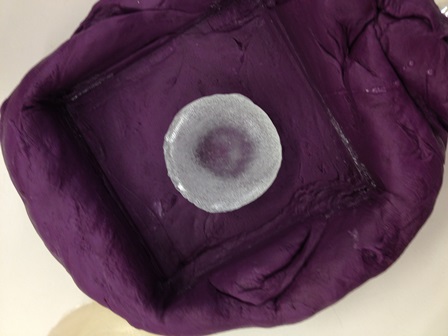
We aimed for a larger lens, 2 inches in diameter, because we had trouble working with the smaller lens earlier. With a large lens, we have more room for error around the edges as we refine our procedure. We used this lens positive to make a mold to cast the resin in. We wrapped the lens positive in plastic wrap to get linear interpolation between the 3D printer ridges. We used an additional layer of plastic wrap in the clay mold, as Olah suggested, but that might have just added wrinkles to the mold and not have improved smoothness at all. Olah recommended the clay for best results, but said that the putty was easier to use. We made several silicone molds because bubbles emerged during molding. Those were due to fidgeting with the mold. It is extremely important to put the lens positive in the mold and then to not touch it again until the mold is set, which takes about 25 minutes. The silicone putty produces a flexible mold, while the clay produces a hard mold.
We applied mold release twice with about five minutes rest after each application. Then we poured in the resin. With the first batch of resin, we used only the silicone molds with mold release applied because the clay mold had not finished drying yet.
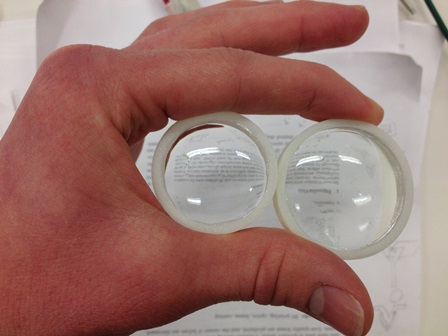
The resin casts produced were not ideal by any means, but definitely deserve to be classified as lenses. They came out of the silicone putty molds rather cloudy, most likely because of the mold release, but this residue was wiped away fairly easily. The flexible silicone mold was so easy to work with that we decided to try molding a lens without the mold release in the next batch
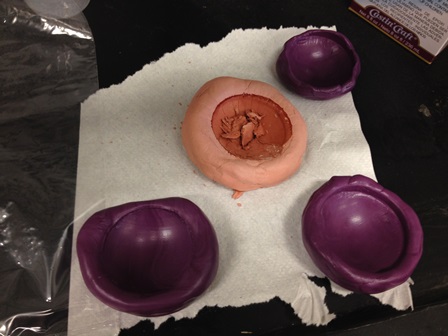
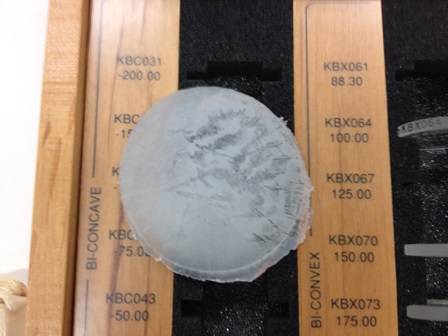
With the second batch of resin, we used the clay mold and one silicone mold without mold release. A number of things went wrong with the clay mold. In his paper, Olah suggested using clay covered with plastic wrap as the best method. I made the mistake of putting the plastic wrap on after the resin was mixed. I couldn’t get the plastic wrap to rest properly, it was obviously going to add a lot of wrinkles to the mold and I didn’t have time to make a drastic change, so I just put the resin directly in the clay mold with no barrier or mold release. It is obvious from the final product (pictured below) that this method was unsuccessful. As you can see in the picture of the molds above, bits of the clay mold stuck to the lens and broke apart, making the mold unusable for any future attempt.
The silicone molds proved much more resilient and user-friendly, showing no wear and tear from one use to another. In addition, the silicone mold was just as successful without mold release. The second-round silicone molded lens is indistinguishable from the first-round ones, and it did not require any cleaning.
Results
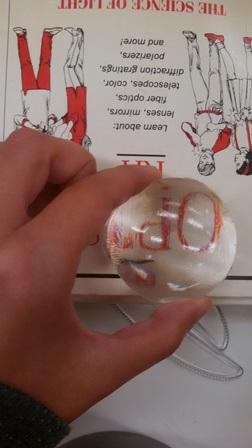
We have concluded that the best way to produce a lens using epoxy resin is to 3D print the lens positive, wrap it in plastic wrap, create a silicone putty mold, and to not use mold release. The best lens we achieved using this procedure is not precise enough to be used in any kind of advanced imaging system, but it does have a distinct focal length and does focus light. Lenses of this quality can be used for less precise industrial applications.
Procedure 2
Using FormLabs Stereolithography 3D Printer to Print Lenses Directly
Most 3D printers start with a solid plastic and apply it in layers in a heated chamber that allows the plastic layers to stick to each other. The thickness of these layers determines how finely the printer can render detail in the printed objects. However, due to advances in 3D printer technology, new printing methods have surfaced. One of these such methods is known as stereolithography. This method allows us to print using a liquid material that solidifies when light is applied. Some of these printers use ultraviolet light while others use lasers. The use of a liquid material allows for the printing of much more detailed and smooth objects such as lenses. The ability to simply print out a lens without intermediate steps would be enormously useful in bringing down the costs of lens production, especially for aspheric lenses.
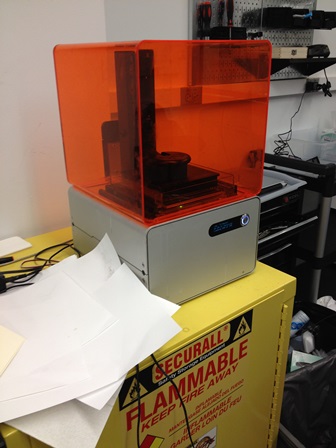
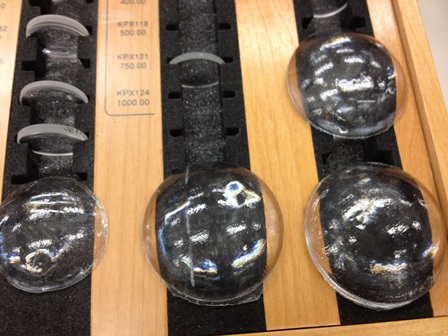
We used the Formlabs Form 1 stereolithography printer to print lenses. The first trial didn’t work because the supports that were printed were not sufficient to hold up the lens pieces, so the pieces collapsed. The second trial did function properly, however the lenses were almost opaque. We tried several methods to improve the transparency of the lenses. We tried sanding them, polishing them with chemicals, and polishing them with a Scotch Brite wheel. We also tried submerging them in acetone and we used a blowtorch to try to polish them with heat. None of these procedures worked, as the lenses were no more transparent afterwards. The only treatment that worked was Krylon Crystal Clear Acrylic coating. After one coat sprayed on each side, transparency improved dramatically. In the images below, you can see the lenses after this assortment of treatments.


Results
This printer produced extremely smooth curved surfaces, much better than the printer used in procedure 1. However, the FormLabs printer is much less consistent. Multiple pieces we printed had parts collapse and other problems. In addition, the supports that the FormLabs printer uses leave little burrs where they attach to the part. Even after sanding, this causes distortions. With a higher-end stereolithography printer, this would be less of an issue, but with our current resources these burrs constitute a significant source of error.
The clarity issue is still an inconvenience, but the Krylon spray makes this procedure workable.
Procedure 2.5
We did attempt to make a silicone mold using a stereolithography-printed lens. It was not as successful as we had hoped. For some reason, the mold had many tiny pores in it and that caused bubbles to set in the resin. Even with extensive sanding, lens clarity could not be achieved.
We made another attempt to make a mold using a stereolithography-printed lens, but it was obvious by inspection that we would have the same problem again. Something about the way the printing medium interacts with the molding medium creates these pores. With more time, we would try to create a mold using a different substance.
Procedure 3
Producing a Parabolic Lens using Rotation
This procedure does not directly deal with 3D printing in any way, but it is an alternative method of lens production. Taking advantage of gravitational force, we plan to revolve the resin from procedure 1 while it sets on a piece of flat glass to achieve a parabolic lens. In order to produce concave lenses, we rotated a circular container of resin about its center, allowing a parabolic surface to be formed as the resin hardens. The fact that rotating the resin or any fluid in this manner will produce a paraboloid can be verified by considering the rotating frame in which the resin is at rest. In this frame, the resin will settle into the outline of an equipotential surface, with the sum of gravity and the centrifugal force being the conservative force on which our potential energy will be based. Knowing that this conservative force will be perpendicular to any given point on the equipotential surface, we can arrive at an expression for the slope of the surface in terms of the centrifugal force and gravity at any point (i.e. its derivative) and are led by integration to a final equation for the surface in cylindrical coordinates: z is the angular frequency squared divided by two times the acceleration due to gravity times rho squared.
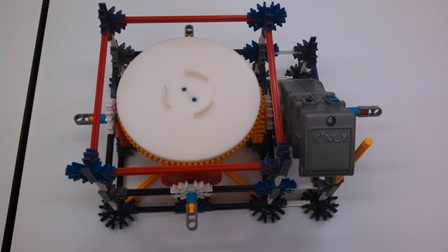
With the understanding that the parabolic surface formed by rotating the vitreous resin could function as a concave lens, we built a rotating platform out of K’Nex to use in spinning the resin. To hold the resin, we 3D printed cylindrical collars of an appropriate size and then used epoxy to attach a piece of plate glass to each collar, forming transparent, planar bottoms. We filled these collars with resin and spun them at approximately 1.7 rps as the resin dried to produce two plano-concave lenses. As this process did not, like previously attempted methods, involve direct molding of the lens surface, these lenses were exceptionally clear, aside from some imperfections resulting from bubbles that formed in the resin as it hardened. These bubbles settled out of the resin in the molds, but were preserved in the revolving procedure.