Ali W and Hudson
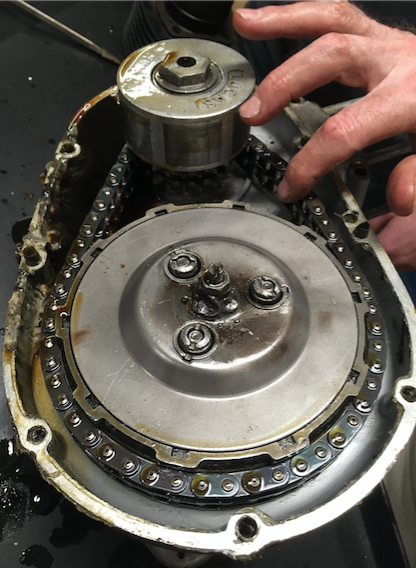
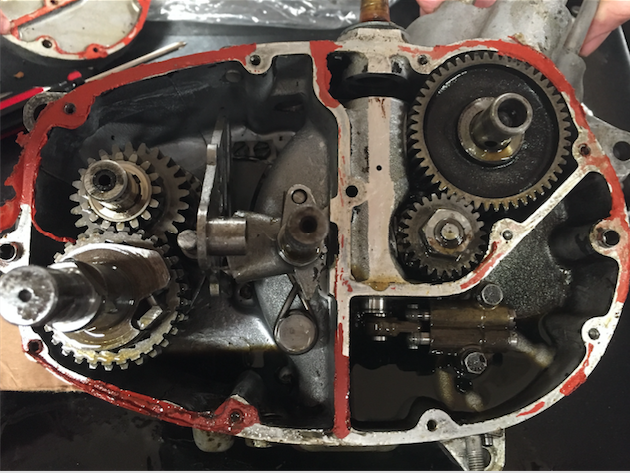
We were assigned to work on the clutch as well as the transmission of the ’65 Tiger Cub, responsible for the disassembly, cleaning, and re-assembly. Our first job was to help the top end and bottom end teams take apart the engine, breaking it into the timing side (transmission & bottom end) and the clutch side. The biggest thing we noticed was the excess of old oil throughout the main compartments of the engine (see image of clutch below)
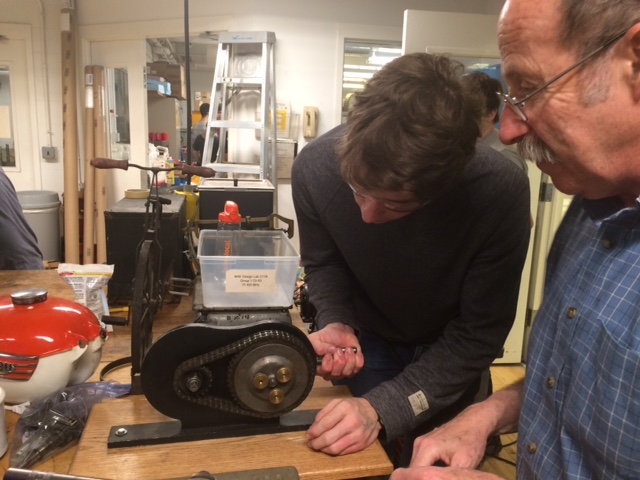
After we disassembled the majority of the engine, we were able to break apart into groups and work on the different parts of the engine. We first focused on the clutch side of the engine (taking it apart, understanding it, and cleaning all parts). We learned how to use different tools in the shop, such as Whitworth wrenches and flathead screwdrivers.
What we learned about the clutch:
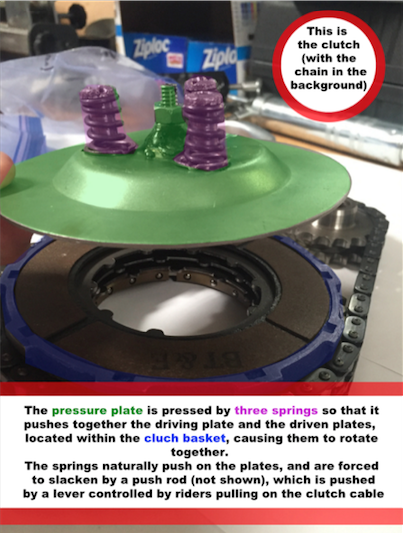
The clutch allows for the the motorcyclist to shift gears and brake without turning off the engine. There are many working parts in the clutch, but the most important ideas are:
– clutch cable attaches to push rod, which disengages clutch from transmission (allowing transmission to freely shift gears)
– clutch has 3 “driven” and 3 “driving” plates in the clutch basket contribute to smaller force needed to disengage clutch (greater number of plates in clutch basket makes it easier to pull clutch lever on handle bars)

After working on the clutch, we “shifted” our attention to the transmission 🙂 We first worked on understanding how the transmission works in relation to the clutch, and then proceeded to clean and reassemble the transmission in the bottom end of the engine.
What we learned about the transmission:
The primary purpose of the transmission is to shift the motorcycle into different gears, allowing for different speeds.
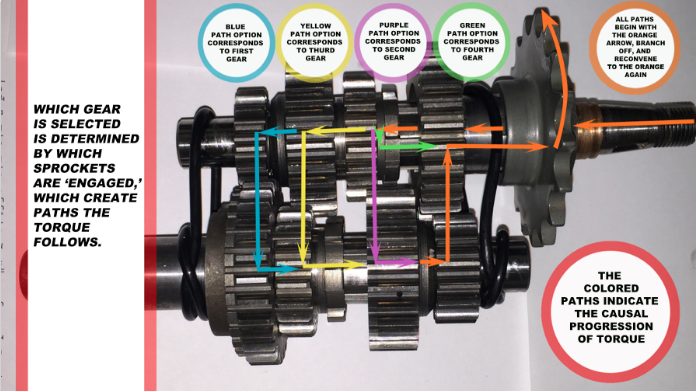
– Torque enters the transmission on the main shaft and travels through the gears based on how they are lined up in relation to each other.
– The gear ratios account for the difference in rotations between the clutch basket and output sprocket (which is attached to the back wheel by the primary chain)
– “Neutral” is in between 1st and 2nd and has the same effect as disengaging the clutch
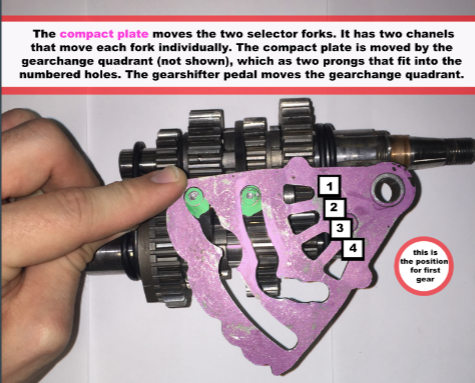
– The motorcyclist physically shifts the transmission by using their foot to push up (or down) on the gear-change quadrant which uses the compact plate and selector forks to align the gears in the correct ratio
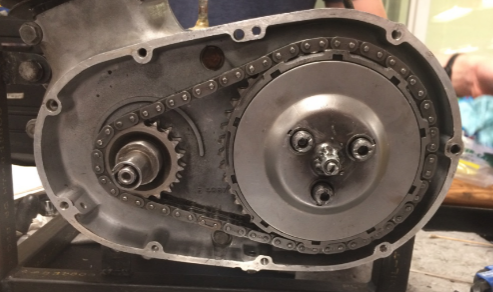
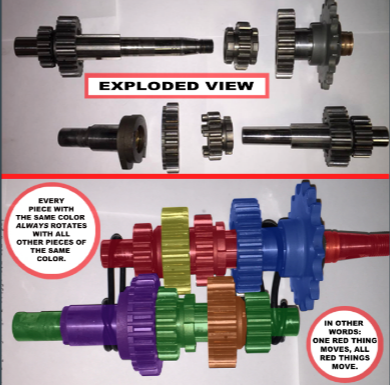
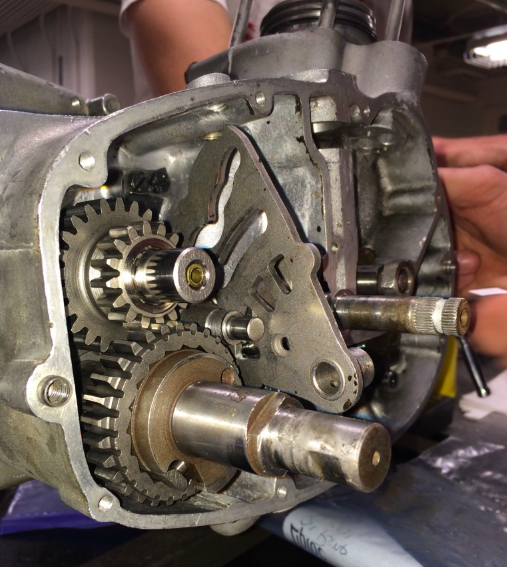
We studied the relationship between the different gears on the “main” and “lay” shafts of the transmission and how they line up with different ratios to account for the corresponding “1st”, “2nd’, “3rd”, and “4th” gears. [See image below]

Lasting thoughts:
We couldn’t be more grateful for the opportunity to work on the clutch and transmission of the ’65 Tiger Cub! While the information may have been overwhelming at times, it is so exciting to truly understand how a motorcycle works. At the start of the course, we could barely figure out how to take off the timing cover on the engine, but now we are confident that we could restore both the clutch and transmission all on our own with the knowledge we have gained from this class. One of the coolest experiences at Princeton by far, thanks to everyone who made this class possible!
Best Regards,
Ali & Hudson