Linear induction motor
row of electromagnets
((magnetic river video))
Materials:
- Iron wire (gauge??)
- Magnet wire (copper wire with clear, thin insulation in order to fit in more turns)
Procedure:
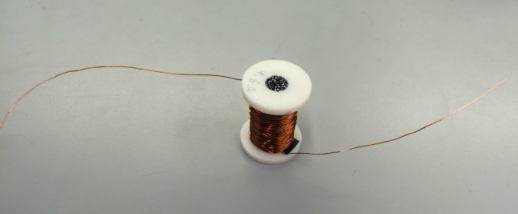
Making the electromagnets:
We are going to make 12 electromagnets using the iron wire and magnet wire. Once coiled about the spools, each electromagnet should have about 3.7 ohms of resistance.
- Use a 3D printer to print 12 cylindrical spools, which will be the structural bases of the electromagnets
- Attach a spool to the end of a drill, leaving about 2 inches of wire on the end and taping it on if necessary
- Attach the magnet wire to the spool using electric tape
- Coil the wire around the spool using the drill (guide the wire up and down the spool with your hand)
- Once the wire is about 0.2 inches from the edge of the base of the spool, stop the drill and secure the end of the wire, leaving about 2 inches of wire on the end
- Strip both ends of the magnet wire using the razor blade until the lighter orange color of the copper core is visible from all sides of the wire
- Begin cutting iron wire in 1.5 inch sections (a length that is just slightly smaller than the height of the 3D printed spools)
- Once the wire is cut, roll it under something heavy to flatten any kinks or bends
- Stuff the iron rods inside each 3D printed spool, until you can shake the spool and no wires will fall out from the center (should take about 85-90 rods per spool)
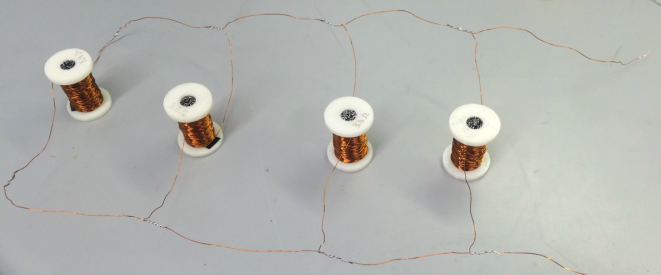
Attaching the electromagnets:
We are going to attach the magnets in three separate rows (4 per row), so each row will correspond to a phase of our 3 phase power source (motor). We will connect the magnets in parallel rather than series to lessen the total resistance of the row of magnets. Once connected, each row should have about 1.1 ohms of resistance.
- Space the magnets about 2 inches apart from each other, and cut two 18 inch sections of magnet wire to match the full distance of the spread magnets (with a little left over on the ends)
- Strip 4 sections (about 1 inch long) of each 18 inch wire leaving about 2 inches in between each stripped section
- Twist the stripped ends of each electromagnet wire to the stripped sections of the 18 inch wires, matching the top and bottom ends of the coils
- Solder the twisted wires together (should be 8 sections of twisted wires that need to be soldered)
- Strip the ends of each of the 18 inch wires using the razor blade until the lighter orange color of the copper core is visible from all sides of the wire
- Once you have soldered three identical rows of electromagnets, place them all in one row, making sure none of the soldered sections are touching
Attaching the electromagnets to the power source: