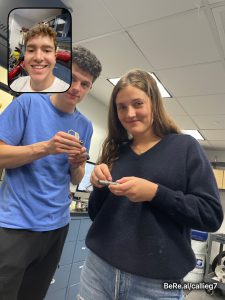
Luke, Cal, Leighton
https://docs.google.com/presentation/d/1CvYyEG-NyI1KQZ76l8P5-TCYu4AbQ1o18EAGBlS8xWg/edit?usp=sharing
Week of January 24
- Divided into groups and was briefed on the project.
- Completed lab safety assessment.
- Watched Professor Littman start up some of the previous groups bikes and observed aspects such as the oil flow.
Week of January 31
- Organized parts into draws and labeled them correspondingly. Set up the lab for the summer.
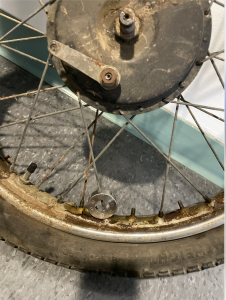
- We worked with the frame group so they could detach the wheels. Top and bottom clamp on the front axle. Real axel is threaded and held in with two nuts. Hubs are in pretty good shape but the rims are all rusted.
Week of February 7
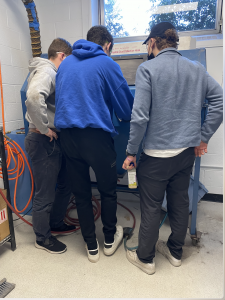
- We learned to use the sandblaster with Tucker to clean parts with chipped paint, corrosion, or rust. A sandblaster works by pushing sand and air at high pressure against the parts from the frame and wears away the paint and rust on the surface. It uses a pressurized air hose that sucks sand into the airflow, which moves at a high velocity towards the part being cleaned.
- The part could not be too close to the sand because it could be warped The internal gloves protected our hands, which could not get too close to the pressurized air
Week of February 14
- We removed the tires from the rim using a tire iron. Had to work across the circumference. We also documented positioning of the spokes, so it could be restrung correctly.
- We loosened and unscrewed the old spokes from the hub/rim using a spoke wrench
- Often had to use WD-40 for especially stiff spokes/nipples
Week of February 21
- We finished taking off all the spokes from both the front and rear wheels. We then separated the hubs and started taking them apart. The axle nuts were quite stuck and difficult to remove
- We removed the sprocket, retaining ring, brake shoes and bearings. We had some difficulty getting the front wheel bearings out.
Week of February 28
- We cleaned the parts that had been removed from the hubs and would be reused. This was done at the cleaning station with gloves and goggles.
- We got the parts ready to be sandblasted

Week of March 7 & 9: SPRING BREAK
- Only update: missing our wheels <3
Week of March 14
- We sandblasted onehub and a brake plate. We learned how to turn on and connect the sandblaster.
- We scrubbed parts with a wire brush to remove grime
- We then finished up sandblasting the other hub.
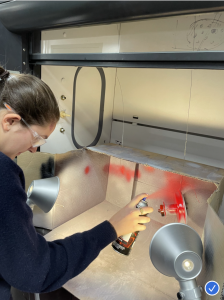
- We went outside and primed both hubs
- We sprayed red paint on the hubs and brake plates
Week of March 21
- Used sandpaper and wire brushes to scrub paint off threading and the surfaces that will touch in the breaks.
- We removed the bearing from the hub by wedging it out with the help of a screwdriver.
- We cleaned up the axles and tested if they would accept the nuts.
- Cleaned up hub cap.
Week of March 28 & 30
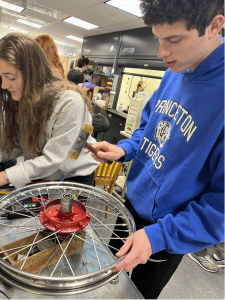
- Bill Becker (wheel expert) visited us on Monday. He gave a presentation on wheels during precept then we worked with him on wheel lacing during lab
- We first put the bearings into the wheel hub
- Used grease gun to fill the bearings before putting them in and thus make the rotation smoother
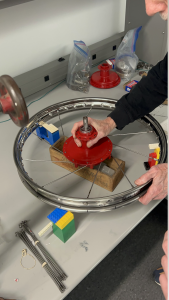
- Started lacing the spokes and had to counterbore the holes because some spokes were a bit too big for the holes
- Needed to elevate the rim/hub slightly and ended up building three lego structures of the same height to prop up the rim
- It took a couple tries to get the correct lacing pattern – kept starting the process and realizing that it wouldn’t work.
- We realized our new spokes were bigger than the old ones, so we had to counterbore holes in the hub to make them fit. We then followed a 4-spoke pattern to correctly lace the wheel. We stayed after class, but did not finish. Professor Littman and Bill Becker stayed later and finished up the first wheel and started on the second.
- Very helpful to refer back to photos we took of the original wheels with their spoke pattern
Week of April 4
- We finished lacing the second wheel: much easier now that we understood the process and had the first wheel to refer to.
- Moved the wheel onto the truing stand instead of lego structures: easier to move around the wheel but had to tape one spoke as a reference point for our starting pattern
- We laced all the spokes of a certain type (inner/outer, drive side/brake side) before moving to another
- Meant that we were counting four spots over from each spoke to put in the next one (because of the groups of 4 pattern)
- Begun the wheel truing process on Wednesday
- We learned about lateral vs radial trueness
- Making small adjustments to groups of four spokes to counterbalance/correct deviations
Week of April 11
- Continued truing the wheel: slow but steady process
- Also added the retaining ring and dust cover
- Had to press the bearings in farther to have enough room: used the strategy of a stack of other same sized bearings and hammering with a mallett
- Could screw the dust cover in (although had to clean off dirt from the threads) but had to use a tool to compress the retaining ring so it would fit
Week of April 18
- Put the tires on the rims
- Tire liner put on underneath
- Used tyre irons and hands to attach one side of the tyre to the rim.
- Carefully pumped up the tyre making sure not to pinch the inner tube.
- Bounced tyre and repeatedly checked back on it to make sure that it held the air.

Week of April 25
- We worked with Professor Littman to attach the rear wheel to the motorcycle
- The wheel was not spinning with ease (slowed down, facing resistance) so needed to find and add spacers
- We started working on our presentation
- Got class sweaters! (our version of leather motorcycle jackets)
Week of May 2
- Gave our presentation and finished up the motorcycle!