Students:
Jack DelGarbino ’24 Brandon M. Spellman ’24


Photos:
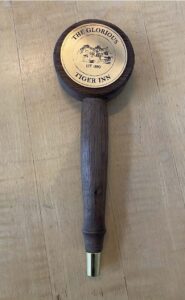
These images depict four different angles of the final product – a checkered, semi-gloss-coated
the cutting board placed onto a wooden stump. Unfortunately, we do not have pictures of the design
process or beginning stages of the project.
2. Description of the project & intent (what & why)
Originally, we intended to construct a full-sized wooden chess board. However, when cutting the
wooden pieces to create the layout of the chess board, one row of squares was too short. (Initial
calculations of the width of each chessboard row did not account for the 1/8th inch lost
during each cut using the table saw). So we decided to pivot the project slightly and create a
checkered cutting board! To do this, we followed the same initial steps of creating the chess board (cutting, staining, gluing, sanding) but then fastened the entire board onto a larger block
of dark wood, and sanded the checkered pieces so that they were all one level. Next, we
covered the entire structure with three coatings of semi-gloss to add a finished coloring. We
rounded the edges of the board. Lastly, we mounted the cutting board onto a wooden stump for
imaging.
3. Description of the tools used (how)
● Bandsaw
○ Used to cut the large supporting piece of wood into the shape that we wanted.
● Orbit Sander
○ Used to level out the different checkered pieces of wood used for our cutting
board
● Cherry Red Wood Stain
○ Used to stain pieces of wood a darker, red-brown color
● PORTER-CABLE 5-Amp Benchtop Sander
○ Used for rounding the edges of the cutting board base
● Varathane Ultimate Polyurethane Water-based Crystal Clear Semi-Gloss
○ Used for coating the entire cutting board structure
● Foam Paint Brushes
○ Used to paint on the semi-gloss coating