List team members & brief description of their responsibilities (who did what)
Chris Brown took over our programming using Autodesk Fusion and oversaw all the inputting and cutting of our tiles and pawns using the laser cutter. Luke Crimmins was responsible for our use of the mill machine, creating the files, and overseeing the cutting of our final baseboard. Cathal Roberts and Kyla Sears supported these primary roles. Cathal Roberts helped Luke in the milling process and was also responsible for the team’s deliverables including the midterm report. Kyla Sears oversaw ordering all materials and made design choices for the color and display of the tiles and pieces. Kyla and Cathal stained the final pieces by hand.
Description of the project & intent (what & why)
Our project was to build a customized wooden Catan game board and pieces in order to assemble a full game set. Our aim was to create a game board of higher quality than the typically sold Catan sets, with a personalized aesthetic created out of carved wood and hand-stained finishing of several colors. The game is fully functional and easily assembled.
Description of the tools used (how)
We used Autodesk Fusion 360 for templates of the board pieces – called tiles – the laser cutter to cut out and engrave the tiles, and the mill machine to carve out our final board where the tiles assemble. We also used the laser cutter to finish all the individual pieces and game pawns to assemble a full board set. We used wood stain to hand paint the tiles and pawns at the end of the process.
If the project is not finished, an explanation of what’s left:
All the game pieces are complete and assembled, the only piece not completely finished is the final cut o our baseboard using the milling process. This is due to a machine error that delayed us several weeks. This final step is set to take place following the conclusion of this school year.
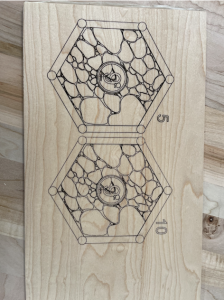
This image shows our first draft of the “stone” tile. The design initially had too many double and overlapping lines, so we used Autodesk Fusion 360 to clean up the design. Here, we were also testing which laser intensity would give us the best look – as you can see we were testing between intensity 5 and 10.
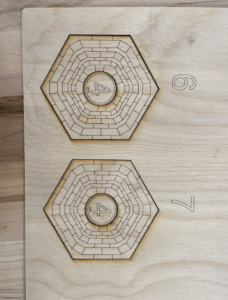
This image shows our second attempt at the tiles. This time we were testing the “brick” tile. You can see that we cleaned up the lines and were testing between laser intensity 6 and 7.

This picture shows how we were able to make the tiles detachable. We adjusted the settings of the laser so that the outside lines and the inside lines cut through the wood. This addition allows for the pieces to be removed from the base and inserted into our board. The pieces in the middle are removed and have letters etched into the back.
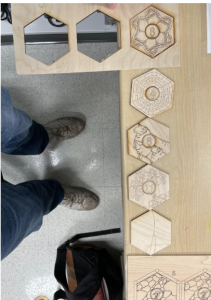
Here you can see the final designs for the tiles we will use on our board. We have finished the tile design process and are ready to make the final cutouts with the wood we ordered. The ones shown in this picture are just drafts.
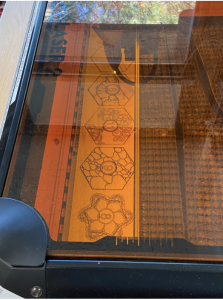
This image shows the final cutouts being made in the Emblaser. The final process will contain 4 sheep tiles, 4 hay tiles, 4 wood tiles, 3 stone tiles, 3 brick tiles, and 1 Desert tile. The inside numbers are detachable and have letters on the back for gameplay.
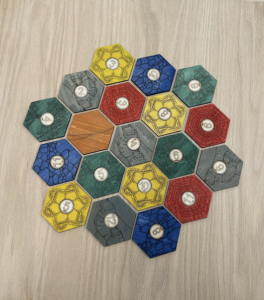
The pieces were then painted in 6 different colors to represent the different items they correspond to. The 4 sheep tiles were painted gray, the 4 hay tiles were painted yellow, the 4 wood tiles were painted green, the 3 stone tiles were painted blue, the 3 brick tiles were painted red, and the desert tile was painted orange. The inside numbers with corresponding letters on the back were not painted.

Using the Autodesk fusion software, the other game pieces were cut out of the wood. The other pieces are the roads, cities, settlements, and building cards. The pieces were painted to match the team that they belong to. This picture shows the settlements, roads, and cities during the painting process.

We used a practice piece of wood to test the milling process for the base of our board. Unfortunately, the xCarver started to drift midway through the process so we need to resolve that issue. Once that’s fixed, the final board can be milled out in a few hours. Additionally, the wood we are using is currently too thick. We talked with Ian about potentially splitting the board apart, shaving it down, then gluing it back together.
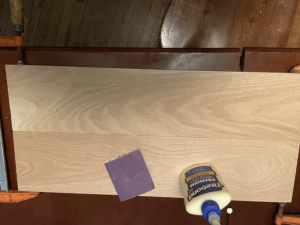
For our final board, we were not able to get a board that fit our needs so we decided to make our own board. To do this we glued together two pieces of wood using clamps. The picture exhibits how this was done. After the two pieces were glued together repeated this process until the board was 4 planks across. Once the glue had been set the board was sanded down in order to make the surface smooth.
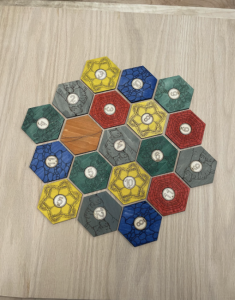
The board is pictured here sanded down and glued together with the final tile pieces on top. When the problems with the mill are solved then this board will be the final piece of our catan set.