Students:
Attila Delingat ’22 Parker Dixon ’22
 .
. 
Backround:
For our project, we are making longboard decks from scratch. Parker and I shared responsibility equally and worked together on everything. There are a number of ways to create decks for skateboards and longboards but they all involve some method of combining sheets of wood to create a deck that is strong and has a certain desired shape. Typically, thin wood veneers are glued together and pressed together in a hydraulic press or vacuum bag using a mold. This process results in high-quality boards but is very difficult in the application and more expensive to keep things simpler we used slightly thicker sheets of baltic birch plywood. This wood, based on several youtube tutorials, was easier to work with while still producing a strong deck.
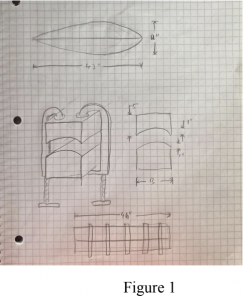
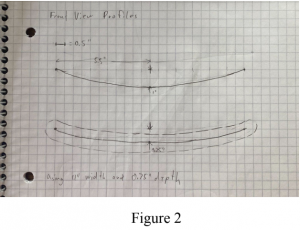
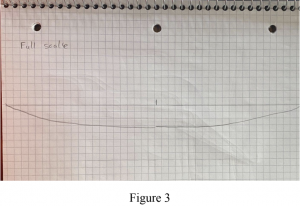
We wanted a surfboard-esque shape such as a pintail or fishtail. The board also needed a curve in the cross-sectional profile for better stance and turning ability, something we also saw in similar designs online. The board would consist of 4 sheets of 1⁄8” 3-ply baltic birch plywood for a total thickness of 1⁄2 inch. We expected this to be sufficiently strong to support our weight. We would buy the trucks and wheels online and fasten them to our decks. Lastly, we wanted to put some custom graphics or paint job on the bottom and have a custom grip tape design on the top. Figures 1-3 show our initial design.
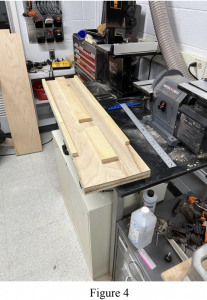
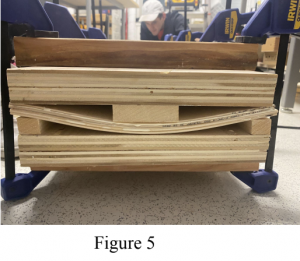
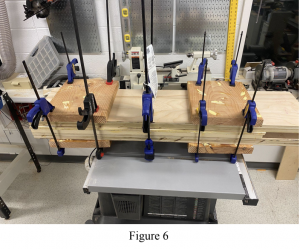
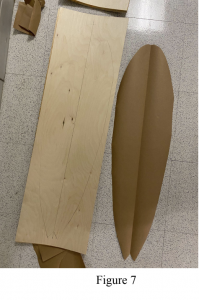
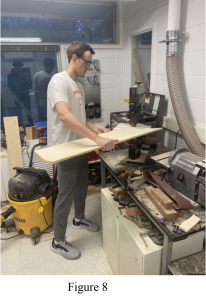
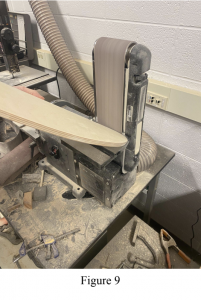
To create the curve and press the sheets together we made a simple mold and clamping system. Initially, we wanted to create a smooth curve with a CNC router but the mold was outside of the size constraints. Instead, we put spacers on the outside of one half and in the middle of the other half of the mold. To glue the sheets together we used standard wood glue on each interior side of the sheets. We applied the glue, stacked the layers, and laid the set on one half of the press. We then used several clamps to press the two halves together while the glue cured. Figures 4-6 show the press layout, clamped press, and side view. After removing the deck blanks from the mold, we made a stencil of our shape and sketched the outline on the board, making sure to draw the centerline (to make sure the trucks are in line later on). We used the band saw to roughly cut the shape out and a belt sander to smooth the edges down. Figures 7-9 show this process.
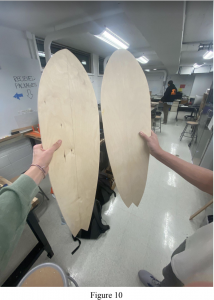
We were successful in creating the decks but unfortunately did not have time to add the last finishing touches. The finished decks are shown in figure 10. We ordered the trucks, grip tape, and some spray paint, and will finish the decks during open hours after dean’s date.
Figures: