Team & Responsibilities
Trevor Forbes & Jeremiah Tyler were the members of this team for creating the accordion storage rack. We equally shared all responsibilities to complete this project. All cutting, painting, and drilling of wood, the complete planning and design process, and anything else that had to deal with completing this project were done simultaneously and together.

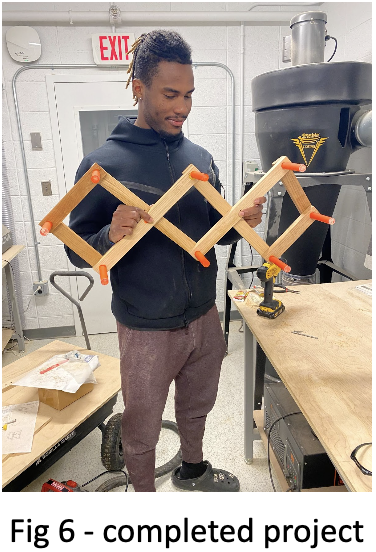
Project Description & Intent
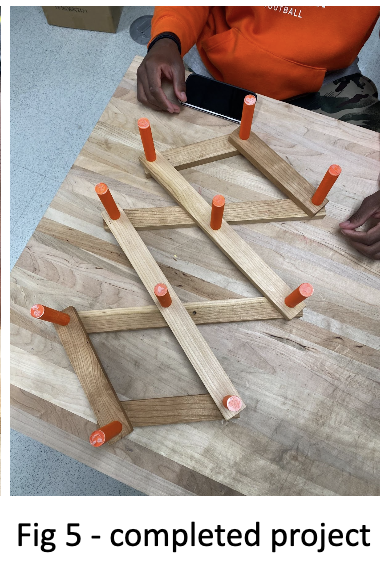
For our project, we decided to create an accordion storage rack. We are roommates and from the very beginning of the school semester, we struggled with where to put clothing and accessories. As a room, we have a fairly large collection of hats & caps and had to store them inside a drawer. Waking up in the morning and attempting to find a hat to wear for the day was a semi-hassle because you would have to pull all of the hats out of the drawer to see what hats were available and how they matched the outfit we were wearing. That’s when we decided that this was the perfect opportunity to create a rack of some sort to place the hats on and make it more accessible.
During our planning process for the class is when we decided to modify it from just a hat rack to a more versatile rack. We brainstormed how to do so and decided to alter the rack to be an accordion-style rack to make sure that it fits any clothing needs we wanted. If we wanted to hang larger items such as coats and jackets we could expand the rack to make more room. If we wanted to put smaller items such as hats or keys, we could collapse the rack to allow more wall room and still carry the items. That’s how the accordion storage rack was created.
Tools Used
- Drill
- We used the drill to connect our wood using 2.5” wood screws
- 2 ½ wood screws
- Wood Glue
- We used wood glue to connect our wooden pegs to our wood
- Wood Finisher
- We applied the wood finisher to give the wood a smoother and distinguished look
- Sawtooth hanger
- We placed saw tooth hangers on the back of the rack to allow it to be hung on a wall
- Hammer
- We used the hammer to connect the sawtooth hangers to the rack
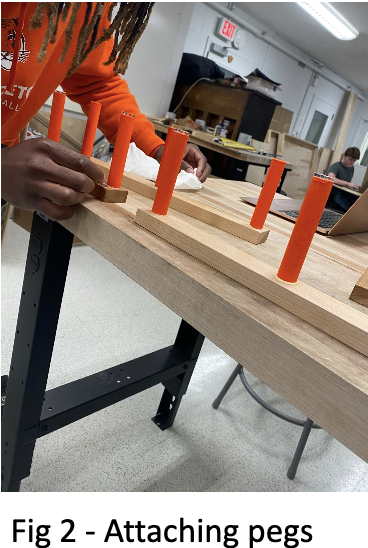
- 3/4 in. x 48 in. Raw Wood Round Dowel
- 1 in. x 2 in. x 8 ft. Cherry S4S Board (2-Pack)
- Miter Saw
- We used the miter saw to cut our wood into four 16” pieces and four 8 ¾” pieces
- We also used the miter saw to cut our Dowel Rod into eight 3” pegs
- Neon Orange Spray Paint
- We used the spray to spray paint the wooden pegs
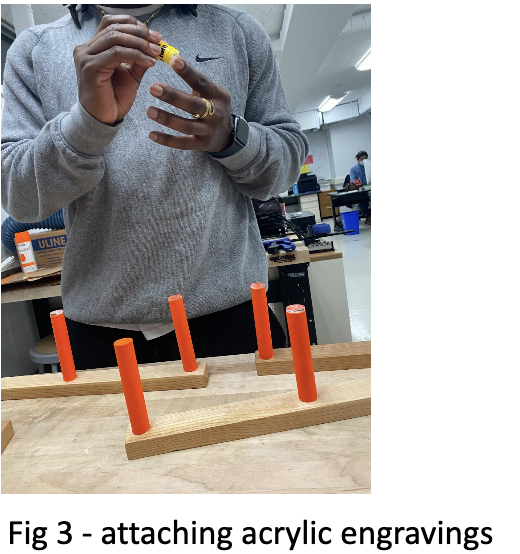
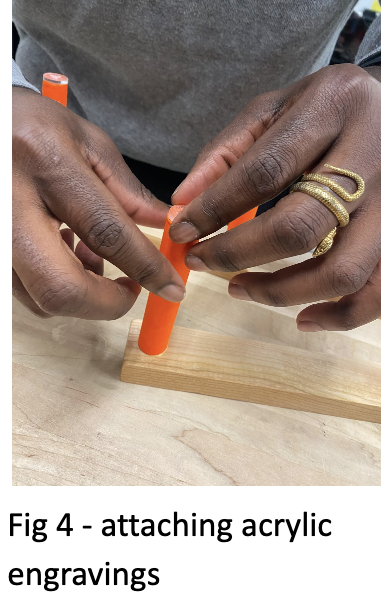
- GlowForge
- We used the GlowForge to engrave cartoon characters into an acrylic sheet to add to the end of our wooden pegs