1. Images
a. Research / our initial concept of what we wanted the table to look like but with dimensions altered to coffee table size as opposed to an office desk size.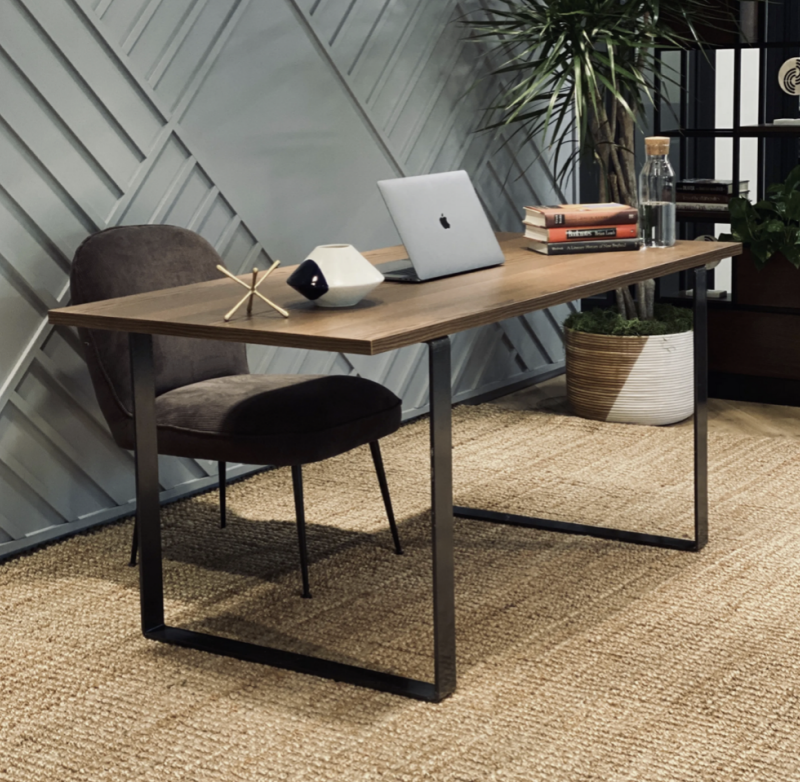
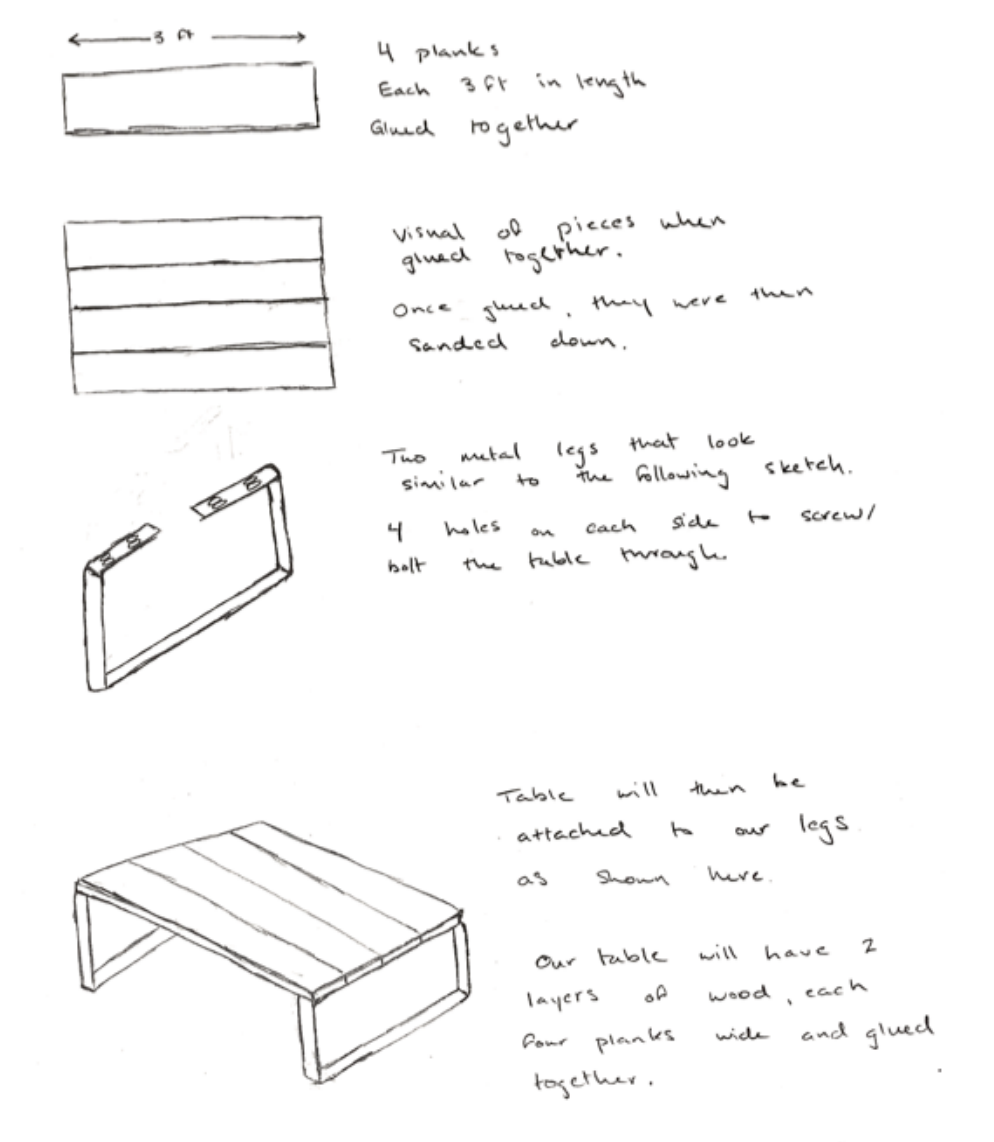
b. Design sketches
c. Experiment / final result
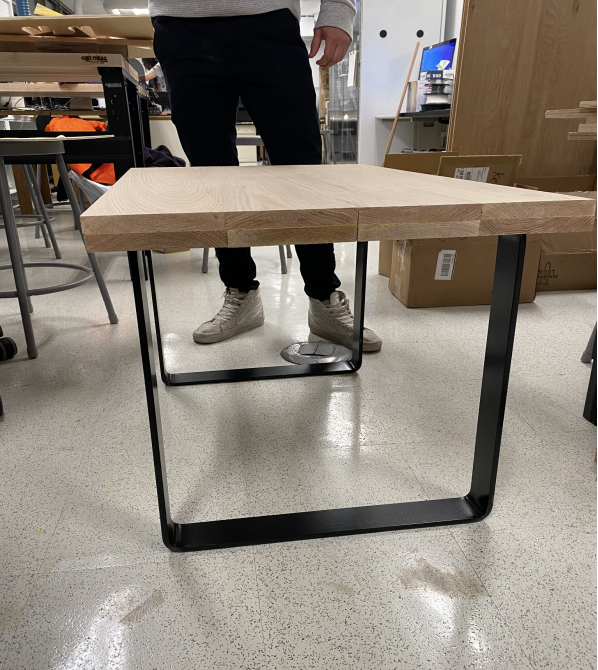
i. View from the side
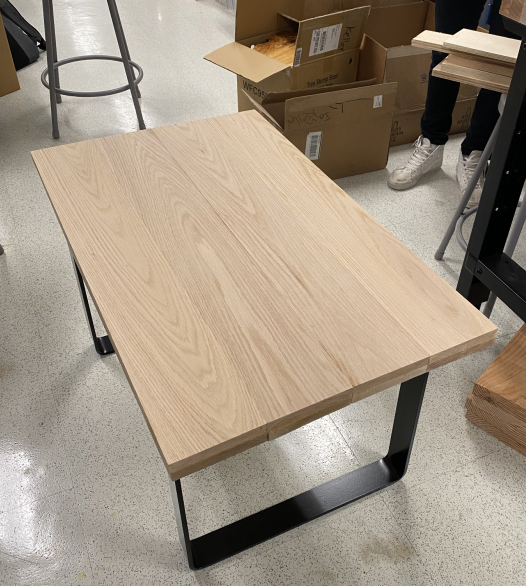
ii. View from above
2. Description of the project & intent
a. This year our group decided to build a coffee table. We chose this because we knew that it would be one of the most practical items we could build and would get significant use (one of us will be taking the table to our apartment next year). Additionally, a few of us had some experience with using certain power saws, but not a lot of experience gluing wood together nor using a sander to put the finishing touches on a table. Therefore, we thought that this project would allow us to mesh that existing experience with a new one – both skills will be very useful for us in the future.
Description of the tools and how we used them
a. After ordering the four 8ft by 6in by 1in planks of oak hardwood and the 18in metal legs that would be attached to the completed tabletop, we sawed off any cracks or faults in the ends of the wood and then measured two 3ft length pieces that would be taken from the center of each larger 8ft plank. After measurements were taken, the Chop Saw was used to make the desired cuts to our pieces of wood and create 8 separate smaller plants that were each 3ft by 6in in length.
b. After creating 8 equal length planks of wood, we glued two planks of wood together along the long edge using wood glue and then repeated this process three more times until we had four separate planks of wood now 1ft by 3ft length. The gluing was a fine process in order to make sure that correct pressure was being applied using clamps in order to make sure that the wood didn’t warp or bend in any direction while drying, but rather stayed flat and flush.
c. Two of these planks were then glued on top of each other, face to face to create a plank of wood that is still 1ft by 3ft in width and length, but is now 2in thick. This process was repeated again for the other two glued planks.
d. The final stage in the gluing process consisted of gluing the two larger planks of wood end to end to increase our total table top width to 2ft by 3ft and 2in in thickness. How the 8 pieces of wood were glued together can be demonstrated well in the picture above depicting the end grain view of our tabletop.
e. While our final slab of wood was completed, there were still several touch-ups that needed to be completed to fix imperfections that arose during the sawing and gluing process. An electric hand sander was used to make all 6 sides of the Tabletop as flat and as flush as possible to create the appearance of one singular plank of wood, fixing all unevenness that was produced during the gluing process. Since the edges of the wood were not completely flush/flat, the last step of the gluing process was slightly imperfect and created a small gap along the centerline of our tabletop. This was filled in using an epoxy wood filler substance which was then re-sanded after drying. Sanding was a long process and once completed using 120-grain sandpaper was repeated again using 220-grain to Increase the smoothness of the finish. Additionally, the corners of the tabletop were sanded down to reduce the sharpness of the edges for user comfort purposes.
f. With the tabletop complete, all that was left was to measure the exact location of where we wanted the legs to be positioned before drilling holes into the bottom of the table and screwing the legs in using wood screws and washers.
4. List team members & a brief description of their responsibilities (who did what)
a. Christian O’Neill
i. Christian helped find and order the exact materials we needed (wood and table legs). He also helped with the sketches of what we wanted our final product to look like. Additionally, he helped cut some of the planks of wood with the chop saw and did a lot of work with the hand sander. Lastly, he helped with gluing the wood together and applying the clamps to the wood in order for the glue to work optimally.
b. Corey Andonovski
i. Corey also helped with the sketches of our final product. He also used both the chop saw and did a lot of work with the hand sander. Lastly, he helped with gluing the wood together and applying the calipers to the wood in order for the glue to optimally keep the wood together.
c. Finnian Evans
i. Finn helped find the materials we needed. He also helped a lot with the measurements for the wooden planks and then used the chop saw to cut the wooden planks. Finn also sanded a lot of the final pieces of wood and helped apply the clamps to the wood.
d. Michael Ufberg
i. Mike helped us find and order the materials we needed. Additionally, he helped with measuring the length of the wooden planks and using the chop saw to cut one of the pieces of wood. He also helped glue the wood together and applied the clamps to the wood to hold it together. He also helped sand the final piece of wood.
5. If the project is not finished, an explanation of what’s left
The only addition that we may add to our table is various finishes the tabletop, either a wood stain or simple varnish to darken the complexion of the wood and then potentially add a clear coat finish which could further protect the delicate wood from water damage and other factors coffee table use presents all while improving the overall look of the piece of furniture.